In today’s digital age, managing multiple email accounts efficiently is essential for both personal and professional productivity. If you use a custom email address (e.g., [email protected]) and want to access it through popular platforms like the Gmail app or Snappymail, you’re in the right place. This guide will walk you through the process step by step, ensuring a seamless login experience.
Why Use the Gmail App or Snappymail for Custom Emails?
The Gmail and Snappymail are popular email clients that offer user-friendly interfaces, robust security features, and excellent integration with other tools. By linking your custom email to these platforms, you can:
- Access all your emails in one place.
- Enjoy advanced spam filtering and organization features.
- Sync your emails across multiple devices.
- Use additional productivity tools like calendars and task managers.
Whether you’re a business owner, freelancer, or individual, this guide will help you set up your custom email effortlessly.
Need a Custom Email Address? Contact Us Today!
Table of Contents
How to Log in to a Custom Email on the Gmail App
The Gmail app supports custom email addresses through IMAP or POP3 settings. Follow these steps to log in:
Step 1: Download and Open the Gmail App
- If you don’t already have the Gmail app, download it from the Google Play Store (Android) or Apple App Store (iOS).
- Open the app and sign in to your existing Gmail account (if applicable).
Step 2: Add Your Custom Email Account
- Tap your profile picture in the top-right corner.
- Select Add another account.
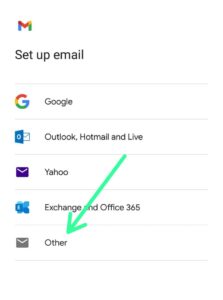
- Choose Other (since your custom email is not a Gmail account).
Step 3: Enter Your Custom Email Credentials
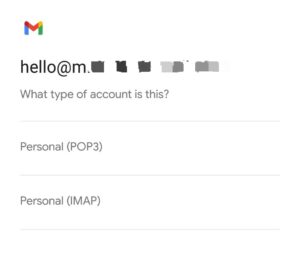
- Enter your full custom email address (e.g., [email protected]) and tap Next.
- Select IMAP or POP3 as the account type. IMAP is recommended for syncing emails across devices.
You can read this article to understand the different Email account types: Email Protocols Explained: SMTP, IMAP, and POP3 Demystified
Step 4: Configure Incoming Server Settings
- IMAP Path Prefix: Leave this blank or enter “INBOX.”
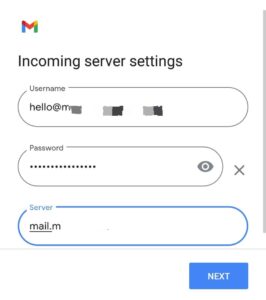
- Username: Your full custom email address.
- Password: Your email account password.
- Server: Enter your domain’s incoming mail server as provided by your provided by your hosting provider or IT administrator (e.g., mail.yourdomain.com).
- Port: Use 993 for IMAP (SSL) or 995 for POP3 (SSL).
Step 5: Configure Outgoing Server Settings
- SMTP Server: Enter your domain’s outgoing mail server as provided by your hosting provider or IT administrator (e.g., mail.yourdomain.com).
- Port: Use 465 (SSL) or 587 (TLS).
- Username: Your full custom email address.
- Password: Your email account password.
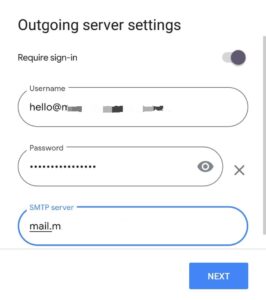
Step 6: Complete the Setup
- Tap Next and wait for the app to verify your settings.
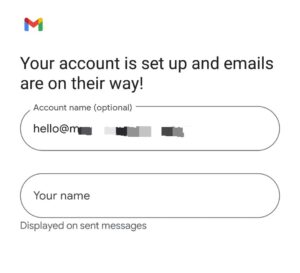
- Once verified, you’ll be able to access your custom email directly from the Gmail app.
- Add your Name to be displayed on sent messages.
How to Log in to a Custom Email on Snappymail
Snappymail is a lightweight, fast, and secure webmail client that supports custom email addresses. Here’s how to log in:
Step 1: Access Snappymail
- Open your web browser and go to your Snappy Webmail login page (usually provided by your hosting provider or IT administrator).
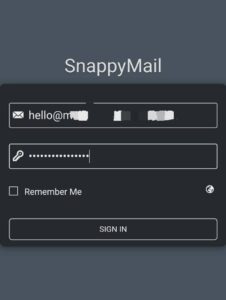
Step 2: Enter Your Custom Email Credentials
- Enter your full custom email address (e.g., [email protected]) and password(Passphrase).
- Click Login.
Step 3: Configure Server Settings (If Required)
- If Snappymail doesn’t automatically detect your server settings, you may need to manually enter them:
- Incoming Server: imap.yourdomain.com or mail.yourdomain.com (enter as provided by your hosting provider or IT administrator).
- Outgoing Server: smtp.yourdomain.com.
- Ports: Use the standard IMAP (993) and SMTP (465 or 587) ports.
Step 4: Start Using Snappymail
- Once logged in, you can send, receive, and manage your custom emails directly through Snappymail’s intuitive interface.
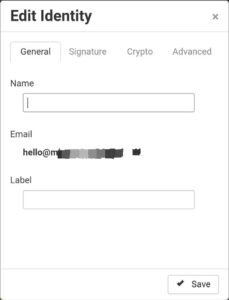
- Set your Identity (Name to be displayed on sent messages.)
Tips for a Smooth Login Experience
- Double-Check Your Credentials: Ensure your email address and password are correct.
- Verify Server Settings: Contact your hosting provider or IT team if you’re unsure about the correct server details.
- Use Strong Passwords: Protect your email account with a strong, unique password.
- Clear Cache and Cookies: If you encounter login issues, clear your browser cache or app data.
Conclusion
Logging in to a custom email on the Gmail app or Snappymail is a straightforward process that can significantly enhance your email management experience. By following the steps outlined in this guide, you’ll be able to access your custom email seamlessly, whether you’re on the go or working from your desktop.
If you found this guide helpful, feel free to share it with others who might benefit from it. For more tips and tutorials on email management and productivity tools, stay tuned to our blog!
